This is a quick overview of the workflow when we want to publish our iOS app. This post is intended to get you through the needed steps, and hopefully give you a quick and solid grasp of how all the things works and connected. We will not cover the app development process here. Before you start, please note that you can also read the fully documented guide about how to distribute your iOS app here.
Enroll
Since distributing our iOS app is not free, make sure that you have enrolled for apple developer program here
Certificates, IDs & Profiles
After login to developer account, go to **Certificates, IDs & Profiles. **There are basically 3 kind of things we need to setup here:
Certificates
This thing identifies you as the developer / publisher who develop the app. We need to download the certificate and then install it in our local machine, by double clicking on the file.
App ID
This is the ID of your app (e.g com.vendorname.app)
Provisioning profile
To make it simple, this thing associates your certificate and the App ID you want to publish, so that they (Apple and your customers) will know who was publishing an App. As we all know, Apple treats this kind of things seriously. Just like the certificate, we need to download the provisioning profile and install it in our local machine, so that it can be recognized later in Xcode.
iTunes Connect
Sign in to iTunes connect. There you can register an app record for the App ID you just create before. App record is basically the meta data of your App, e.g app title, app description, price, etc. iTunes connect is the place where our app will be uploaded.
Prepare & Upload
I personally use ionic framework to develop my app. When the app is ready to production or testing, we need to build it:
ionic build ios
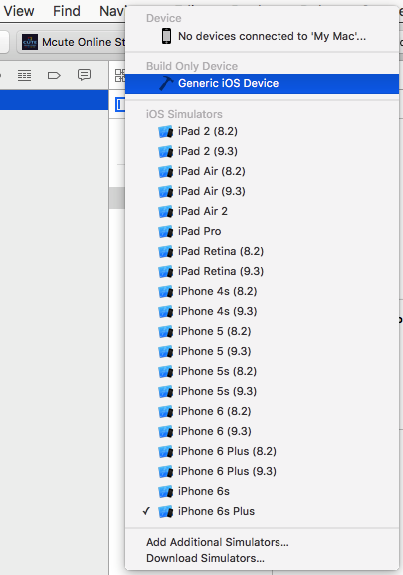
There will be an .xcodeproj file inside platforms/ios/ directory. And we can open it with Xcode by double clicking on it. After that, make sure that we associate the app with the correct provisioning profile, that is the one we create earlier. We need to build it, yes..again, but this time we do it in Xcode (I use Xcode version 7.3). Click on Product > Build. Then we need to archive the app. Click on Product > Archive. NOTE: In order to build and archive our app, we need to target a real device or generic build only device in xcode. See figure below
After that open Window > Organizer where you can see a list of your archives. There, you can choose the options to validate, export, or upload your app to the iTunes Connect. And finally from the iTunes Connect, we can submit the app to the app store.
Summary
Distributing my iOS app to the app store for the first time is an exhausting experience. We need some couple of separate steps and I, personally spent hours to gather information I needed. I was wondering why they create such protocol and scatter all the process in different places? Hmm, what do you think? Maybe you can help me answer it in the comment section below. Anyway, that is why this post is written. I hope that you got something useful from here, and thanks for reading.